CMM measurement uncertainty estimation: ISO 15530-3
Coordinate measuring machine (CMM) has been used in many manufacturing industries, ranging from aerospace, automotive to consumer product, that mass-produces various types of parts.
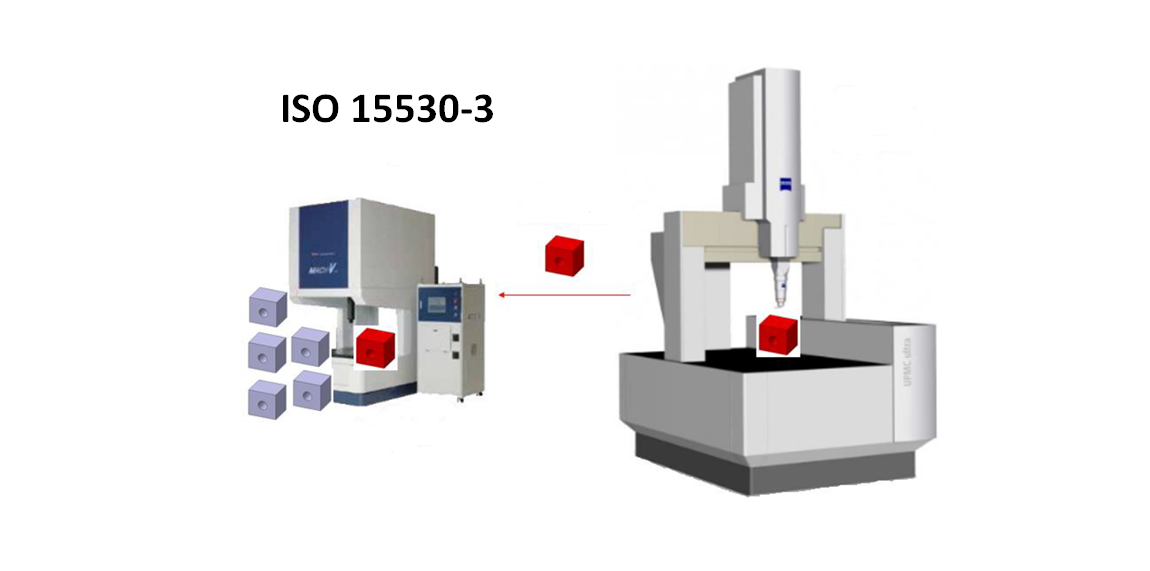
Coordinate measuring machine (CMM) has been used in many manufacturing industries, ranging from aerospace, automotive to consumer product, that mass-produces various types of parts.
ISO 15530-3 is the most used method to estimate CMM dimensional and geometrical measurement uncertainties in shop floors, especially for medium-to-high production volume parts (to justify the cost of reference artefact calibration).
Hence, it is important that we understand the concept of ISO 15530-3 as well as the procedure to calculate the estimated uncertainty of a CMM dimensional and geometrical measurement using the ISO 15530-3 standard. All operators, supervisors and managers of quality inspection department should understand the method.
Let us discuss the ISO 15530-3 method!
READ MORE: CMM measurement uncertainty estimation: Relevant uncertainty contributors
CMM uncertainty: ISO 15530-3
ISO 15530-3 is a method to estimate CMM measurement uncertainty that uses a calibrated artefact with similar shape or geometry (in term of length, geometry and angle) with a measured part.
In addition, the results of the calibration process of a reference artefact will be compared with the results of the measurement process of workpieces. The workpiece measurement should have similar environment conditions with the environment where the workpiece will be measured in productions.
This ISO 15530-3 method is the most common adopted method by industries to estimate their shop floor CMM measurement uncertainties.
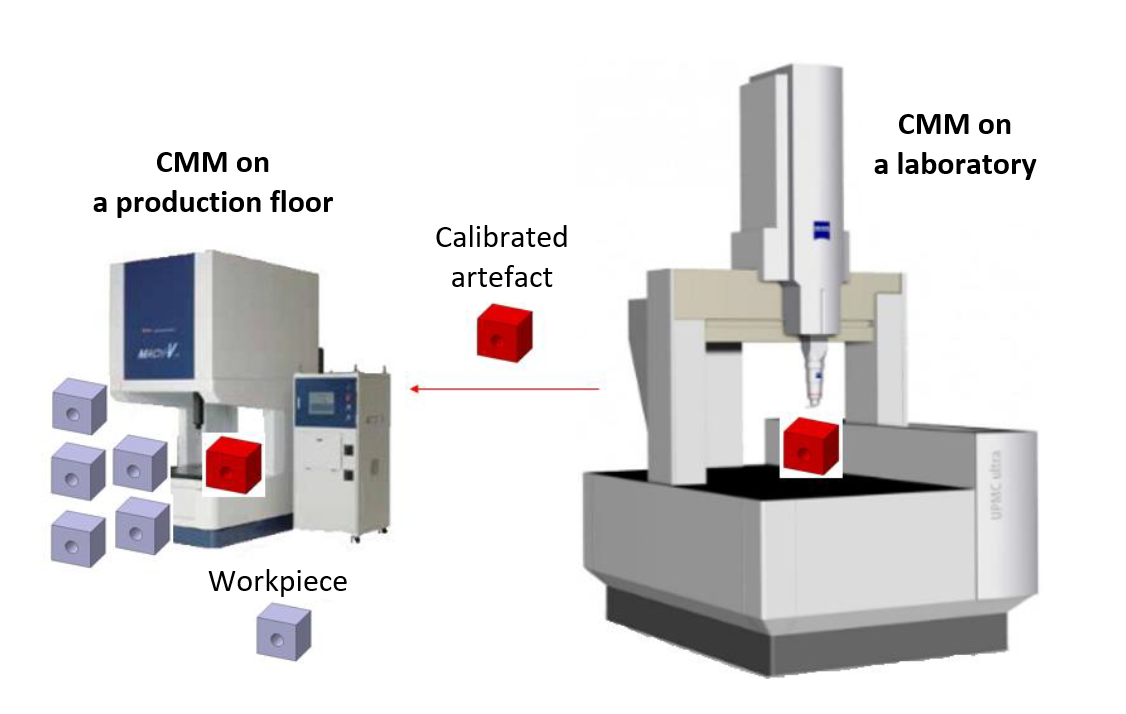
Figure 1 below shows how the ISO 15530-3 method is implemented in shop floor. In figure 1, an in-line CMM instrument is used to inspect the quality of parts in a manufacturing line.
From figure 1, this in-line CMM, integrated into the manufacturing line, is used to measured mass-produced parts (grey colour in figure 1 below) at the shop floor.
To estimate the measurement uncertainty of the in-line CMM, a part (that will eventually become a calibrated or reference artefact for the mass-produced parts) which has a similar shape or geometry with the mass-produced part (red colour in figure 1 below) should be calibrated by another off-line CMM that has a higher accuracy than the accuracy of the in-line CMM. The off-line CMM is usually placed in a controlled laboratory to reduce measurement errors and uncertainty.
The method to estimate the uncertainty of the mass-produced part measurements by the in-line CMM involves the measurement of the calibrated part and several mass-produced parts. The main reason is that the uncertainty estimation will also consider relevant uncertainty contributors originated form shop floor.
Calculation steps of ISO 15530-3 method
The procedure to estimate CMM measurement uncertainties using ISO 15530-3 is as follow:
- Calibrated artefact measurements for at least 10 times with different sampling strategies and different measurement period to get $u_{p}$.
$u_{p}$ is formulated as:

Where $Y_{i}$ is the $i-$th measurement of the calibrated artefact. $n_{p}=10$.
$\bar{Y}$ is calculated as:

- The measurement of the calibrated artefact and a produced or manufactured part for 20 times. Then, the difference between the measured produced part and calibrated artefact is calculated. The calculation is to get $u_{b}$ as follow:

Where $n_{b}=20$. $diff$ and $\bar{diff}$ are defined as:

- The measurement of different mass-produced parts that are produced from different batch productions.
This procedure is to consider variations contributed from the mass-production process including the variation contributed from the thermal expansion of the parts and vibration noise form the shop floor.
This procedure is to calculate $u_{w}$ as follow:

Where $n_{w}$ is the number of measurements from several mass-produced parts, $Y_{part-i}$ is the measurement result of the $i-$ part. And, $\bar{Y_{part}}$ is calculated as:

The explanation of the above variables is as follow:
- $u_{cal}$ is the uncertainty source obtained from the calibration of the reference (calibrated) artefact that has similar shape or geometry to its counterpart from the production
- $u_{p}$ is the uncertainty source obtained from CMM geometrical errors, stylus error and sampling error
- $u_{b}$ is the uncertainty source obtained from the correction error of length and size measurements
- $u_{w}$ is the uncertainty source obtained from part-to-part variation, for example, errors due to production process imperfections, temperature variation and environment effect, such as vibration noise
Finally, the calculation to estimate CMM measurement uncertainty by using ISO 15530-3 is:

The value of $k=2$ represents 95% confidence interval with Normal (Gaussian) distribution assumption.
The normal distribution assumption is valid due to the central limit theorem.
READ MORE: CMM measurement uncertainty estimation: ISO/DTS 15530-2
Benefits and disadvantages of ISO 15530-3 method
The benefits of using ISO 15530-3 are:
- The ISO 15530-3 method needs to be performed only one time to calibrate a reference part and then can be applied for all CMM measurements with similar part shape and production process with the reference part
- All measurements are performed with similar conditions (for example, environment and sampling strategy) of where mass-produced parts will be measured
The disadvantages of using ISO 15530-3 are:
- This ISO 15530-3 requires a calibrated or reference artefact that has similar shape or geometry with mass-produced parts to be measured. The cost to have this calibrated artefact with the similar shape will be high, as usually this reference artefact should be made from strong material to be stable over time (usually made from a higher material grade compared to its production part). Hence, the calibration cost will be high
- This ISO 15530-3 is difficult to be implemented and to estimate the uncertainty of CMM measurement of part that has a free-form or complex shape. Because producing such reference artefact with free-form shape is difficult and expensive
- The cost to implement ISO 15530-3 method can only be justified for parts with medium-to-high production volume
READ MORE: The history and introduction of CMM: the inseparable relation between CMM and GD&T
Conclusion
In this post, ISO 15530-3 method to estimate CMM measurement uncertainties has been presented.
This uncertainty estimation method is the most used method to estimate the uncertainty of dimensional and geometrical measurement of mass-produced parts by using a CMM.
This ISO 15530-3 method is suitable to be implemented for medium-to-high volume production parts. Because, only with medium-to-high production volume, the cost to manufacture a reference artefact that has similar shape (geometry) with a part to be measured is very expensive.
All calculation procedures to estimate CMM measurement uncertainty using ISO 15530-3 has also been presented.
You may find some interesting items by shopping here.
